
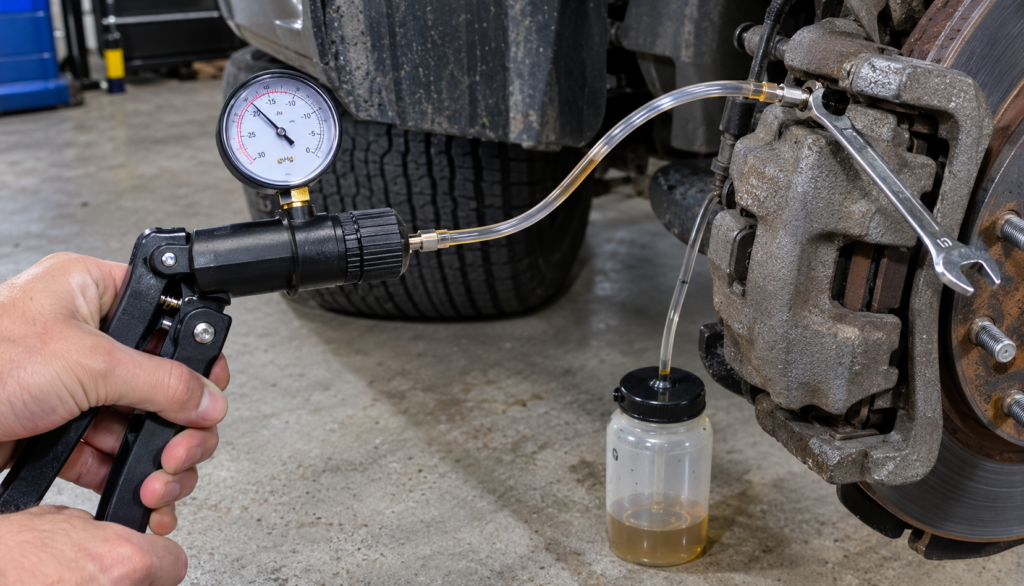
If your brake pedal feels soft, spongy, or sinks slowly to the floor, there’s a good chance you have air trapped in the brake lines. A vacuum brake bleeder is one of the easiest ways to fix that by yourself, without needing a second person to pump the pedal. This guide walks through the full process: what a vacuum bleeder actually does, the tools you need, the correct bleed sequence, and the mistakes that trip up most first-timers.
What Is a Vacuum Brake Bleeder and How Does It Work?
A vacuum bleeder is a hand tool or small electric pump that pulls a vacuum through a hose connected to the bleeder screw on each brake caliper. As the vacuum pulls, it draws old brake fluid — and any trapped air bubbles — out of the brake line and into a collection jar. You top off the master cylinder as you go, so fresh fluid gets pulled through the system in place of the old fluid and air.
Common tools in this category include a hand vacuum pump (like a Mityvac) or a fully assembled vacuum brake bleeding kit that includes the pump, a clear hose, and a fluid catch jar with a one-way check valve. The check valve matters — it stops air and fluid from getting pulled back into the line once you release the pump handle.
Why Bleed Brakes With a Vacuum Bleeder Instead of the Two-Person Method
The traditional way to bleed brakes involves one person pumping the brake pedal while another opens and closes the bleeder screw at the caliper. That works fine, but it requires two people working in sync, and it’s easy to introduce new air if the timing is off.
A vacuum bleeder lets you do the entire job alone. You control the vacuum pump and the bleeder screw yourself, at your own pace, without needing anyone in the driver’s seat. This is the main reason vacuum bleeding kits are popular with home mechanics working solo in a driveway or garage.
Signs You Need to Bleed Brakes
Before starting, confirm that bleeding is actually the right fix. Common signs include:
- A spongy or soft brake pedal that sinks closer to the floor than normal
- A brake pedal that feels firm at first, then slowly sinks while holding pressure
- Reduced braking performance after replacing a caliper, brake line, or master cylinder
- Visible air bubbles in the brake fluid reservoir
- The brake fluid hasn’t been changed in 2+ years (moisture absorption lowers the fluid’s boiling point over time)
If the pedal feels fine but braking performance has dropped, the cause may not be air in the lines at all — worn pads, a warped rotor, or a failing caliper can produce similar symptoms without any air being present.
Tools and Materials You’ll Need
| Item | Purpose |
|---|---|
| Vacuum bleeder (hand pump or electric) | Pulls fluid and air through the line |
| Correct brake fluid (DOT 3 or DOT 4 — check your owner’s manual) | Replaces old, air-contaminated fluid |
| Wrench sized to your bleeder screw | Opens and closes the bleeder valve |
| Clear tubing (usually included with the kit) | Lets you watch for air bubbles as fluid is drawn out |
| Turkey baster or fluid extractor | Removes old fluid from the reservoir before topping off |
| Shop rags and safety glasses | Brake fluid damages paint and irritates skin/eyes on contact |
Brake Bleeding Order: Which Wheel First?
The correct bleed sequence depends on your vehicle’s brake system layout, but the general rule for most vehicles is to start with the wheel farthest from the master cylinder and finish with the one closest to it. On a typical vehicle, that means:
- Passenger rear
- Driver rear
- Passenger front
- Driver front
Some vehicles — particularly those with diagonally split brake systems — use a different order. Check a repair manual or diagram specific to your make and model before starting, since bleeding in the wrong order can leave air trapped in a line you thought was already clear.
Step-by-Step: How to Bleed Brakes Alone With a Vacuum Bleeder
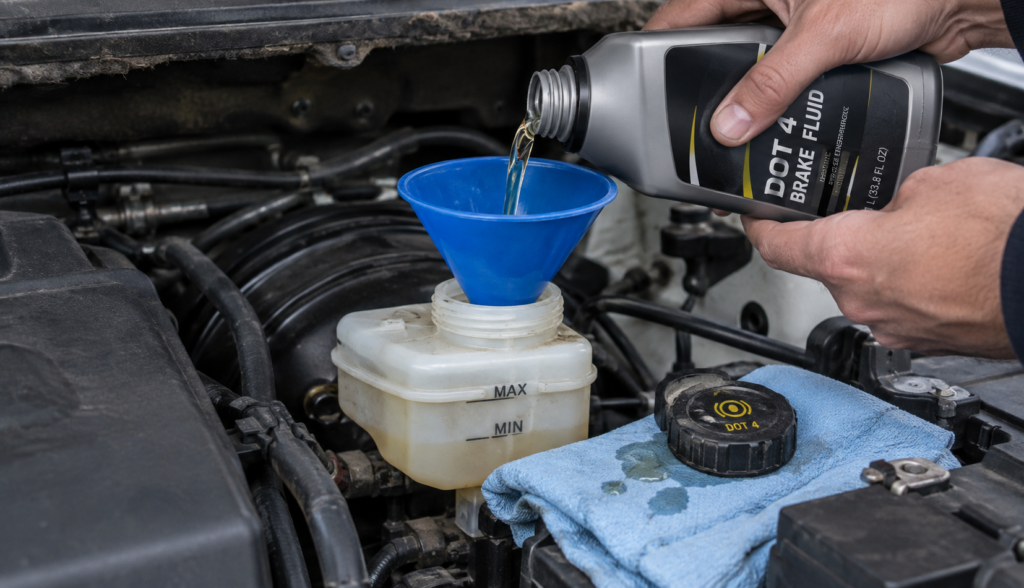
- Check and top off the brake fluid reservoir. Never let the reservoir run dry during the process — this is the single most common way people accidentally reintroduce air.
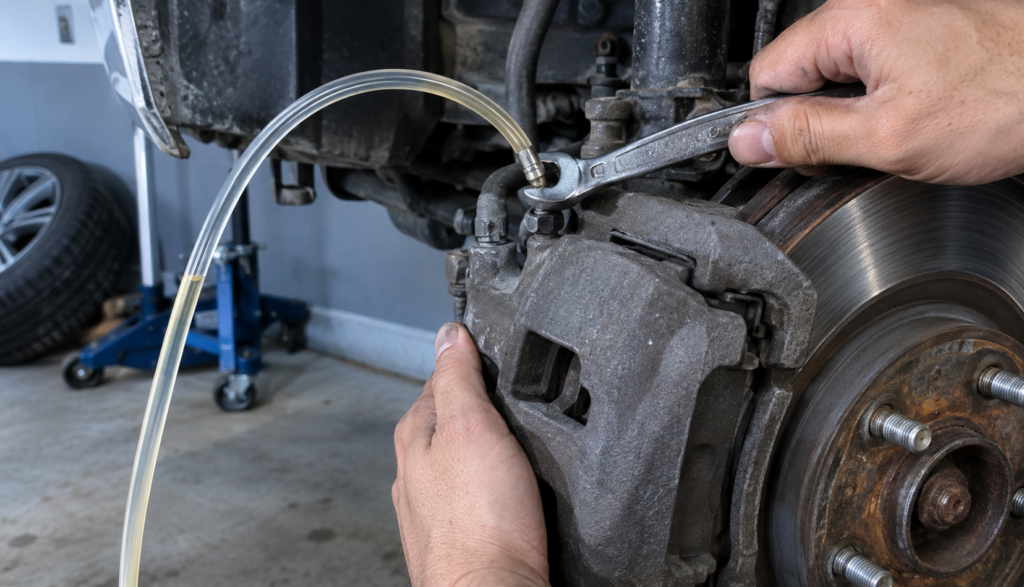
- Locate the bleeder screw on the first caliper in your bleed sequence, and fit the correct wrench over it without removing it yet.
- Attach the vacuum bleeder hose to the bleeder screw, making sure the connection is snug enough that it won’t pull in outside air.
- Pump the vacuum bleeder to build vacuum in the collection jar (a hand pump usually needs several strokes; an electric unit will build vacuum on its own).
- Open the bleeder screw slightly with the wrench. You’ll see fluid and any trapped air bubbles pull through the clear hose into the jar.
- Watch the fluid stream. Once it runs clear and free of bubbles for several seconds, close the bleeder screw before releasing vacuum pressure.
- Check the reservoir level and top off before moving to the next wheel.
- Repeat at each wheel in the correct bleed order, rechecking the reservoir between each one.
- Test the pedal. With all four wheels bled, pump the brake pedal a few times with the engine off. It should feel firm and stop well above the floor.
What the Warning Light Doesn’t Tell You
A vacuum bleeder is excellent at pulling fluid through the line, but it has one known weakness: it can pull tiny amounts of air in around the bleeder screw threads even when the line itself is fully bled. This shows up as a thin, steady stream of small bubbles that never fully goes away, even after the fluid runs clear. That’s often not air from inside the brake system — it’s air being drawn in through the screw threads by the vacuum itself, sometimes called a false vacuum reading.
If you’re seeing this, don’t assume the brakes are unsafe or that something is broken. Try wrapping the bleeder screw threads with a thin layer of thread sealant or applying a small amount of grease around the threads before reattaching the hose — this often stops the false bubbles completely. If the pedal still feels soft after a full bleed cycle and the fluid runs clean, the issue may not be air at all: a failing master cylinder, a collapsed brake hose, or an ABS module that needs to be bled through a scan tool (common on many newer ABS-equipped vehicles) can all mimic the symptoms of trapped air. A vacuum bleeder alone generally can’t clear air out of the ABS modulator on these systems — that usually requires either a pressure bleeder with the ABS in a bleed mode, or a two-person manual bleed following the manufacturer’s specific ABS bleed procedure.
Vacuum Bleeding vs. Other Bleeding Methods
| Method | People Needed | Best For |
|---|---|---|
| Vacuum bleeding | 1 | Solo home mechanics, routine fluid changes |
| Gravity bleeding | 1 | Slow, simple jobs with no rush; relies on fluid dripping out over time |
| Pressure bleeding | 1 | Shops and repeat use; pressurizes the reservoir from above |
| Manual two-person bleeding | 2 | ABS systems or when no bleeder tool is available |
When people weigh gravity bleeding vs. vacuum bleeding, it usually comes down to speed and reliability — gravity bleeding works, but it can take significantly longer and is less effective at pulling small air bubbles off the inside of the line. Pressure bleeding vs. vacuum bleeding is more of a convenience trade-off: pressure bleeders push fluid from the top down and are common in professional shops, while vacuum bleeders are cheaper and better suited to occasional home use.
Common Vacuum Bleeding Mistakes to Avoid
- Letting the reservoir run empty mid-bleed, pulling new air into the system
- Bleeding the wheels in the wrong order for your vehicle’s brake system layout
- Overtightening the bleeder screw, which can snap it off in the caliper
- Mixing brake fluid types (check whether your vehicle takes DOT 3 or DOT 4 before starting)
- Reusing brake fluid that’s already been bled out — old fluid has already absorbed moisture and air; don’t pour it back in
- Assuming a firm pedal on a lift means the job is done — always confirm with a full stop test once the vehicle is back on the ground
How Long Does Brake Bleeding Take?
Bleeding all four wheels with a vacuum bleeder typically takes 30–60 minutes for a straightforward system with no ABS complications, once you’re set up. Add extra time if this is your first time, if a bleeder screw is seized or corroded, or if you’re chasing a persistent false vacuum reading at the threads.
Brake Bleeding Cost If You’d Rather Not DIY
Having a shop bleed your brakes typically runs somewhere in the range of a standard labor charge for a routine service, often bundled in with a full brake fluid flush rather than billed as a standalone bleed. A full fluid flush (which bleeds all four corners and replaces all the old fluid) is generally worth doing every two years regardless, since brake fluid absorbs moisture over time and that moisture lowers its boiling point — which matters most under hard, repeated braking.
FAQ
Q. Does a vacuum bleeder work alone, or do I need a second person?
A. It works alone. That’s the main advantage of a vacuum bleeder over the traditional two-person pedal-pumping method — you control the vacuum pump and the bleeder screw yourself.
Q. Why do I still see tiny bubbles after bleeding with a vacuum bleeder?
A. This is usually a false vacuum reading caused by air being pulled in around the bleeder screw threads, not air from inside the brake line. Sealing the threads with a bit of grease or thread sealant often solves it.
Q. Can I use a vacuum bleeder on a car with ABS?
A. You can bleed the standard brake lines with a vacuum bleeder, but many ABS systems trap air inside the ABS modulator itself, which typically requires a scan tool to cycle the ABS valves during bleeding, or a shop-grade pressure bleed procedure.
Q. What happens if the reservoir runs dry while I’m bleeding?
A. You’ll pull new air into the line, undoing your progress at that wheel. You’ll need to top off the reservoir and re-bleed that wheel until the fluid runs clear and bubble-free again.
Q. How do I know when a wheel is fully bled?
A. The fluid coming through the clear hose should run clean and free of bubbles for several seconds in a row before you close the bleeder screw.