
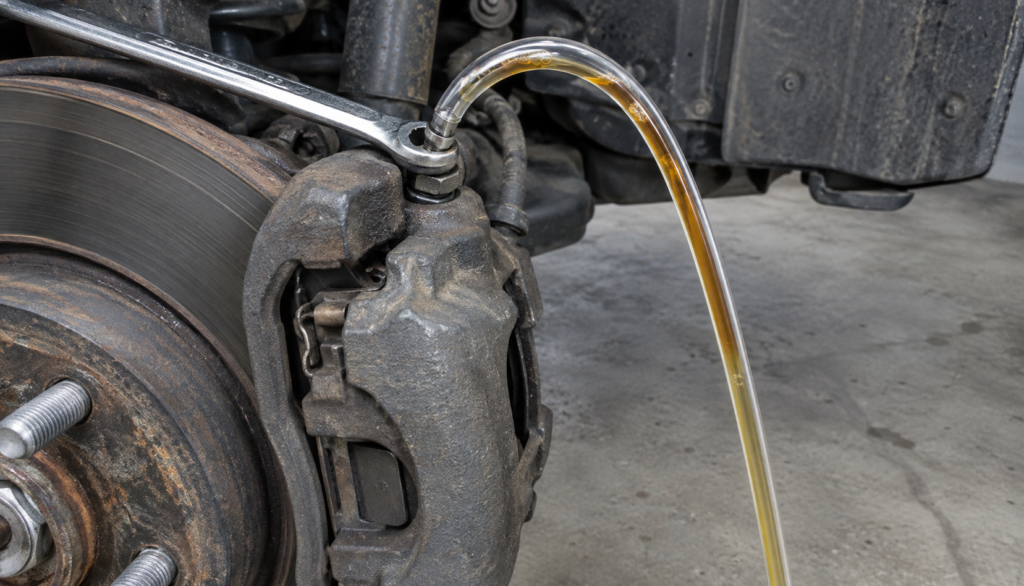
If the brake pedal on your 2009 Silverado 2500HD feels soft, sinks slowly, or travels farther than it used to, there is a good chance you have air in the brake lines. The fix is to bleed the brakes, and on this truck it is a job a careful owner can do in the driveway in about an hour with basic hand tools. This guide walks through the correct bleeding sequence, the tools you need, and the three most common ways to do it, plus the mistakes that leave a pedal spongy even after you think you are finished.
The 2500HD is a heavy truck that often tows and hauls, so the brake system works harder than it does on a half-ton pickup. That makes clean, air-free brake fluid more important here than on most vehicles. Take your time, keep the brake fluid reservoir topped up, and never let it run dry during the job.
When You Need to Bleed the Brakes on Your Silverado 2500HD
Most owners only bleed brakes when something goes wrong or when a part has been opened up. The signs of air in brakes are easy to spot once you know them. A spongy brake pedal that feels soft under your foot is the classic one. Other signs include a pedal that needs pumping to firm up, longer stopping distances than normal, and a pedal that slowly sinks while you wait at a red light. In the worst case the pedal sinks to the floor.
You should also bleed the system any time the hydraulic side has been opened. That includes a new brake caliper, a brake hose replacement, a replaced brake line, or a new master cylinder. If you are asking how often to bleed brakes as routine maintenance, the usual brake fluid change interval is every two to three years, because brake fluid absorbs moisture over time. A full bleed during that service pushes the old fluid out. Bleeding after a new caliper is especially important, because the fresh part is full of air. Replacing brake pads without bleeding is fine in most cases, since the hydraulic side stays closed, unless you opened a bleeder screw or let the caliper piston push fluid backward in a way that introduced air.
Tools and Supplies You Need
Gather everything before you jack up the truck. Running out to the parts store halfway through is how reservoirs run dry and air gets pulled into the master cylinder.
- Fresh DOT 3 brake fluid from a sealed bottle. GM specifies DOT 3 for this truck, and the cap on your reservoir will confirm it. Never reuse old fluid and never open a bottle that has been sitting half-full for a year.
- Box wrench that fits the bleeder screw. Bleeder screws are small, so check the size on your truck before you start. A six-point or flare-nut style wrench grips better than an open-end wrench and is less likely to round the screw.
- Clear tubing that fits snugly over the bleeder nipple, and a catch bottle with a little fresh fluid in the bottom.
- Jack, jack stands, and a lug wrench. A bottle jack alone is not safe for this job.
- Brake cleaner and shop rags to wipe up drips.
- Optional: a brake bleeder kit, a vacuum bleeder, or a pressure bleeder if you want to work alone.
A basic brake bleeder kit with a one-way valve costs very little, and a hand vacuum bleeder is a modest purchase. Doing it yourself costs a fraction of the cost of a brake fluid flush at a shop, which is why many owners handle it themselves. DIY vs shop bleeding really comes down to your tools and your confidence with the ABS side of the job.
Before You Start: Safety and Prep
Park on level ground, set the parking brake, and chock the wheels that stay on the ground. Loosen the lug nuts, lift the truck, and place jack stands under the frame or axle at solid points. Remove all four wheels so you can reach each bleeder screw.
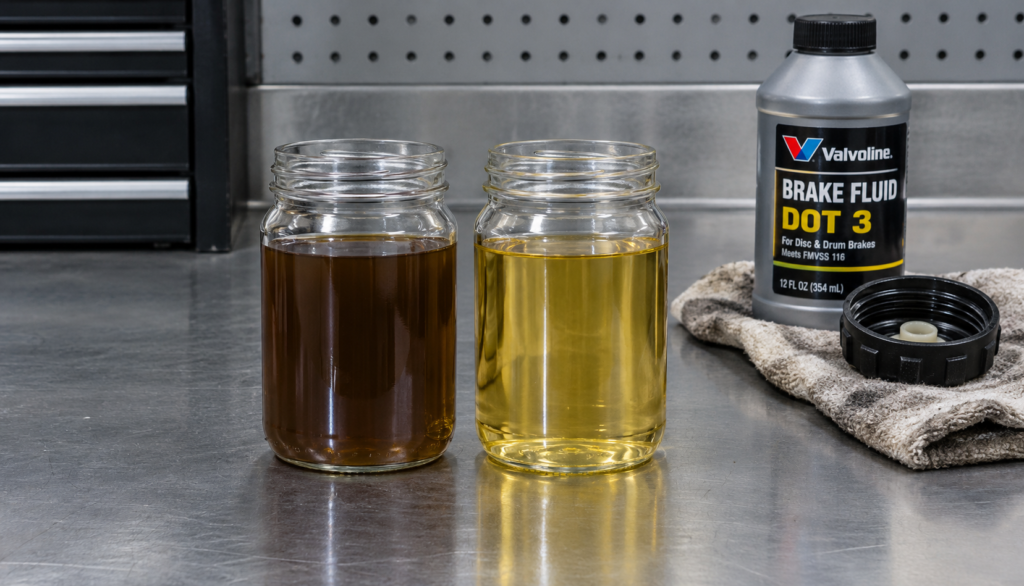
Brake fluid spills damaging paint is a real risk, so keep a rag or a bottle of water handy for spills. Open the reservoir cap and look at the fluid. Dark brown or black fluid is a sign it is overdue for replacement. Fill the reservoir to the line with fresh fluid, and plan to check it after every few pedal strokes throughout the job.
Spray the bleeder screws with penetrating oil the day before if the truck has seen road salt. Old bleeder screws can seize, and a snapped screw turns a one-hour job into a caliper replacement.
The Correct Bleeding Sequence
The bleeding sequence works from the wheel farthest from the master cylinder to the closest. On a 2009 Silverado 2500HD, the standard order is as follows.
| Order | Wheel | Why it goes here |
|---|---|---|
| 1 | Right rear | Longest brake line from the master cylinder |
| 2 | Left rear | Second longest run |
| 3 | Right front | Shorter run, front brake circuit |
| 4 | Left front | Closest to the master cylinder |
Starting at the right rear and finishing at the left front pushes air out of the longest lines first. If you have been told a different order for another truck, stick with this one for your 2500HD unless your service manual says otherwise.
Step-by-Step: The Two-Person Method
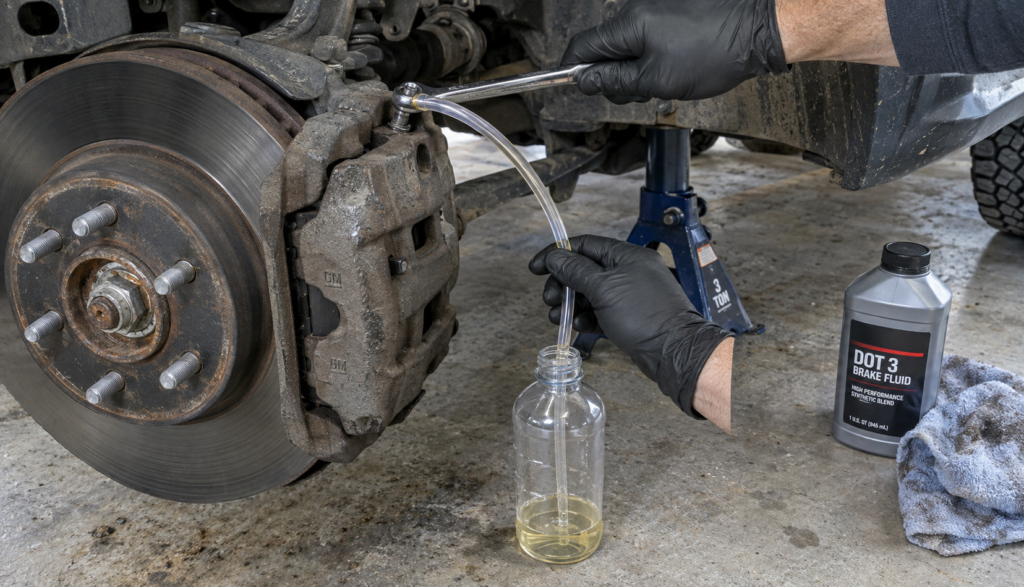
The two-person method is the traditional way to bleed brakes and still the most reliable for a first-timer. One person pumps the pedal and the other works the bleeder screw.
- Start at the right rear. Slip the clear tubing over the bleeder nipple and put the other end in the catch bottle, below the fluid level in the bottle.
- Have your helper pump the brake pedal three or four times, then hold it down firmly.
- With the pedal held down, open the bleeder screw about a quarter to half turn. Fluid and air will flow into the tube.
- Close the bleeder screw before your helper lets the pedal come up. This is the step people forget, and it is how air gets pulled back in.
- Have your helper release the pedal slowly. Repeat until the fluid in the tube runs clear with no bubbles.
- Check the reservoir and top it off. Then move to the left rear, right front, and left front in that order.
Snug each bleeder screw closed when you are done. Do not overtighten it, because the screws are small and break easily. Wipe each one clean and, if the truck has bleeder caps, put them back on.
One-Man Brake Bleeding, Vacuum, and Pressure Methods
Can you bleed brakes alone? Yes. One-man brake bleeding is possible with a one-way valve bleeder kit that lets fluid out but stops air from coming back in. You open the screw, pump the pedal yourself, and watch the tube for bubbles. A vacuum bleeder pulls fluid from the bleeder screw using suction, and it works fast, though a poor seal around the bleeder threads can pull in tiny air bubbles that look like air from the system. Wrapping the threads with a little Teflon tape helps.
A pressure bleeder attaches to the reservoir and pushes fluid through the system, which is the cleanest option and what many shops use. It needs the correct adapter for the Silverado reservoir cap. Gravity bleeding, where you simply open each bleeder screw and let fluid drip out, works in a pinch but is slow and tends to leave small pockets of air behind on a truck with long brake lines.
How long does it take to bleed brakes? Plan on 45 minutes to an hour with a helper, and a little longer working alone. Bleeding is not complete until the pedal feels firm, so do not rush to hit a time.
Bleeding the ABS Module and Bench Bleeding the Master Cylinder
Two situations call for more than a basic bleed. First, if you replaced the master cylinder, bench bleeding the master cylinder before you install it removes the air that would otherwise be trapped in its chambers. Mount it in a vise, connect short lines that loop back into the reservoir, and push the piston in slowly until no bubbles come out.
Second, if the brake lines ran dry or the pedal stays soft after a normal bleed, air may be sitting inside the ABS module. Bleeding ABS brakes properly usually calls for a scan tool that can run the automated bleed procedure and cycle the valves inside the module. A pedal bleed alone will not move air out of those passages. If you do not own a capable scan tool, this is a good point to hand the truck to a shop rather than guess.
What the Warning Light Doesn’t Tell You
A lot of owners assume that if the brake warning light is off, the brake system is fine. That is not a safe assumption. The brake warning light on a 2009 Silverado 2500HD typically comes on for a low reservoir level or a pressure imbalance, and air alone in the lines will not always trigger it. You can have a soft pedal and a dark dashboard at the same time.
The opposite problem happens too. A low fluid level is often blamed on a missing bleed, when it is really a sign of a brake fluid leak at a caliper, hose, or line. If you top off the reservoir every few weeks, bleeding will only hide the leak for a while. Check the inside of each wheel and the length of every brake line for wetness before you assume the system just needs air removed.
Finally, a spongy pedal does not always mean air. A swollen brake hose that balloons under pressure, a worn caliper, or a failing master cylinder can all feel the same as air in the lines. If the pedal still sinks after a thorough bleed, or the pedal goes to the floor with no fluid loss anywhere, the master cylinder is a likely suspect. Bleeding a bad part will never fix it, and heavy towing makes a weak brake component fail faster.
How to Tell If Brakes Are Bled Correctly
Before you lower the truck, press the brake pedal firmly several times. It should feel high and solid, not soft, and it should hold steady under steady pressure for at least 30 seconds without sinking. Check the brake fluid reservoir level one more time and top off to the line.
Put the wheels back on and snug the lug nuts in a star pattern. Then torque the lug nuts to the factory spec listed in your owner’s manual, which is commonly 140 lb-ft on a 2500HD, once the truck is back on the ground. Take a slow test drive in an empty lot or quiet street and make several gentle stops before you go anywhere busy. If the pedal feels spongy again after a day or two, you may still have air trapped somewhere, or a leak is letting it back in.
Brake fluid color is a quick check too. Fresh DOT 3 fluid is clear to light amber. If the fluid coming out of the bleeder is still dark after several strokes, keep going until it runs clean, because moisture in brake fluid lowers the boiling point of brake fluid, so old fluid can fade under heavy towing.
When to See a Mechanic
Bleeding brakes is a reasonable DIY job, but some situations are better left to a shop. See a mechanic if a bleeder screw snaps or refuses to turn, if the pedal goes to the floor even after a careful bleed, if you see fluid leaking anywhere, or if the ABS light stays on after the job. The same applies if you suspect air in the ABS module and do not have the right scan tool. A professional brake flush at a shop is not expensive compared with the risk of driving a loaded truck on weak brakes.
Frequently Asked Questions
Q. How often should I bleed the brakes on a 2009 Silverado 2500HD?
A. For routine maintenance, plan on a brake fluid change about every two to three years, or sooner if the fluid looks dark or you tow heavy loads often. You should also bleed the system any time you replace a caliper, hose, brake line, or master cylinder.
Q. Can I bleed the brakes by myself?
A. Yes. A one-way valve bleeder kit, a vacuum bleeder, or a pressure bleeder lets one person do the job. The two-person method is still the most forgiving for a first attempt.
Q. Why is my brake pedal still soft after bleeding?
A. A soft pedal after bleeding usually points to one of a few causes: air trapped in the ABS module, a master cylinder that was not bench bled, a bleeder screw that was left open or leaking air around the threads, or a failing master cylinder or brake hose. Repeat the bleed in the correct sequence and check every line for leaks.
Q. Do I need to bleed the brakes after changing brake pads?
A. Not normally. If you only pushed the caliper pistons back and did not open a bleeder screw or let the reservoir run low, bleeding is not required. Check the fluid level afterward, because it will rise when you push the pistons back.
Q. What type of brake fluid does a 2009 Silverado 2500HD use?
A. It uses DOT 3 brake fluid. Check the reservoir cap and your owner’s manual to confirm before you buy.