
A brake rotor inspection takes about fifteen minutes with the wheel off, and it is the best way to catch a problem before it turns into a longer stopping distance or a bigger repair bill. The brake rotor is the smooth metal disc your brake pads clamp against every time you press the brake pedal, and like the pads, it wears down with every stop. Most drivers only ever look at the brake pads, which is how rotors end up worn past their limit without anyone noticing.
This guide covers how to inspect brake rotors in three stages: a quick look through the wheel, a full visual inspection with the wheel removed, and measuring thickness and runout with proper tools. You will learn what scoring, heat spots, cracks, and rust actually mean, which ones are normal, and which ones mean the rotor has to go.
Why a Brake Rotor Inspection Matters
Brakes work by turning motion into heat. The caliper squeezes the brake pads against the friction surface of the rotor, and the rotor absorbs and sheds that heat. As the rotor wears thinner, it holds less heat, which makes brake fade, cracking, and uneven pad wear more likely. A thin rotor is also weaker, so the risk of it cracking under hard braking goes up.
Manufacturers also set a discard dimension for every rotor. That number is tied partly to how far the caliper piston can travel before the hydraulic system is stretched too far, so a rotor worn past its limit is a hydraulic concern as well as a heat concern. Checking it takes a few minutes and costs almost nothing.
When to Inspect Your Brake Rotors
How often to inspect brake rotors depends on how you drive, but a sensible schedule looks like this:
- Take a quick look through the wheel at every tire rotation.
- Do a full inspection with the wheel off every time you replace the brake pads, and at least once a year.
- Inspect right away if you notice any of the warning signs below.
Warning signs that call for an immediate inspection include a grinding noise or squealing when you brake, pulsation in the brake pedal, shaking in the steering wheel while slowing down, a car pulling to one side under braking, or a longer stopping distance than you are used to. A metal wear indicator on the pad can squeal when the pads are low, while a grinding noise often means the pad backing plate is cutting into the rotor.
Tools and Safety Prep Before You Start
You can do the visual part of the job with basic tools. Measuring takes a few extras.
- Floor jack, jack stands, and wheel chocks
- Lug wrench and a torque wrench for reinstalling the lug nuts
- A bright flashlight
- Brake cleaner, a rag, and a wire brush
- A rotor micrometer or digital caliper for thickness
- A dial indicator on a magnetic base for lateral runout
- Your vehicle’s service manual for the exact specifications
Work on level ground with the engine off and the brakes cold, because a rotor can stay hot enough to burn skin long after a drive. Never get under or near a car supported only by a jack; use jack stands. Spray brake cleaner on the rotor surface instead of blowing dust off with compressed air, since brake dust is not something you want to breathe. When you finish, tighten the lug nuts in a star pattern to the torque value in the manual.
Step 1: Quick Inspection Through the Wheel
If your car has open-spoke wheels, you can inspect brake rotors without removing the wheel for a first impression. Shine a flashlight through the spokes and look at the outer face of the rotor. Crouch down and angle the light to see the inner side as well. Do not touch the rotor or caliper if you have driven recently.
Look for numerous deep grooves, a blue or dark gold tint, or a pad wear indicator that is touching or nearly touching the rotor. Any of these means you need the full inspection. You can also do a simple test drive: brake gently from about 30 mph on a quiet road, and the brake pedal should feel smooth. Any pulsation means the rotors need a closer look.
Keep in mind that a professional brake inspection looks at far more than you can see through the spokes, so treat this step as a screening check, not a clean bill of health.
Step 2: Full Visual Inspection With the Wheel Off
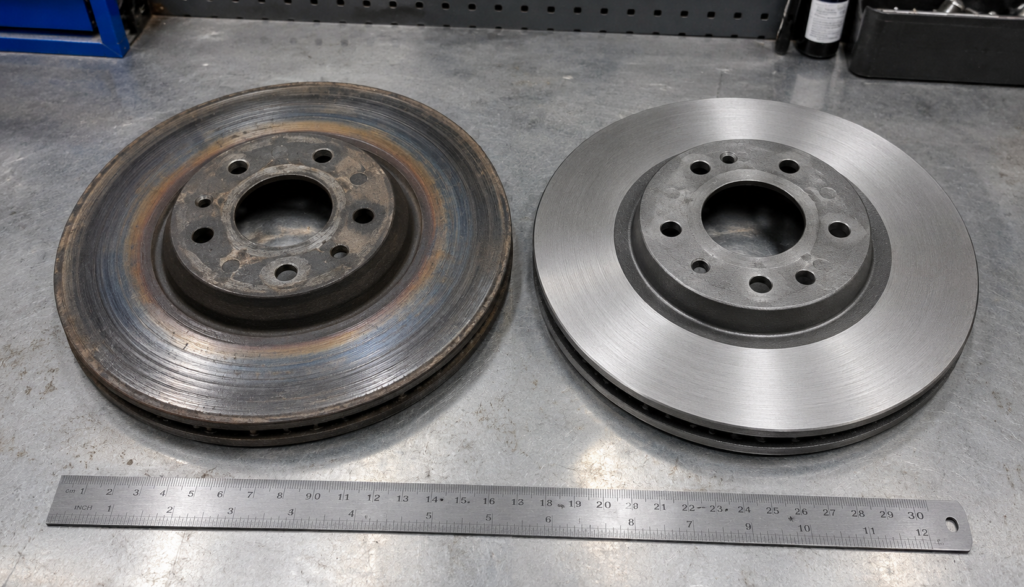
Here is the full routine, front or rear, one wheel at a time.
- With the car on the ground, loosen the lug nuts about a quarter turn.
- Raise the car, support it on jack stands, and remove the wheel.
- Look at both faces of the rotor in good light. Wipe off dust with brake cleaner and a rag if needed.
- Run a fingernail across the friction surface. This is the classic fingernail test: if your nail catches in a groove, the rotor is too scored to keep as is.
- Check the outer edge for a raised lip. The pads wear a recessed track into the rotor, and the unworn edge is left standing above it.
- Scan the entire rotor surface for cracks, paying extra attention to the area around the lug holes and the outer edge. On drilled and slotted rotors, check around every hole and slot.
- Check the color. Blue or dark patches point to overheating.
- Look at the brake pads through the caliper. Compare pad thickness on the inboard and outboard pads, and note whether the pad is worn evenly from top to bottom.
- Spin the rotor by hand and listen for scraping, which can indicate a dragging pad.
- Look at the rotor hat and the hub flange for heavy rust or debris.
What Each Rotor Condition Means
Not every flaw is a reason to replace the rotor. Use this table to sort what you find.
| Condition | What It Looks Like | What It Means | Action |
|---|---|---|---|
| Light surface rust | Orange film on the rotor after the car sits | Normal moisture; clears after a few stops | None |
| Fine scoring | Thin, shallow lines you cannot feel with a fingernail | Normal wear from pad contact | Keep monitoring |
| Deep grooves | Ridges your fingernail catches in | Pads worn through or debris trapped; rotor worn out | Resurface if thick enough, otherwise replace |
| Glazing | Mirror-shiny, almost polished surface | Overheated pads or rotor, reduced bite | Inspect pads; resurface or replace |
| Heat spots and blue discoloration | Blue, dark, or burnt patches | Repeated overheating, possible internal damage | Replace the rotor |
| Cracks | Hairline splits, often near edges or holes | Structural failure risk | Replace immediately |
| Raised lip | Ridge at the outer edge | Normal wear that grows with mileage | Measure thickness |
| Uneven polished tracks | Patchy wear around the disc | Possible thickness variation or runout | Measure both |
Are Rust Spots on Rotors Normal?
Yes, surface rust is normal, especially after rain or a few days parked. It scrubs off the friction surface within a few stops. Rust is only a concern when it forms pits, flakes, or a ridge on the friction surface, or when the rotor hat and hub area are so corroded that the rotor cannot sit flat.
Why Are My Rotors Blue?
Blue discoloration is heat damage. It usually follows towing, mountain descents, or repeated hard stops, or a caliper that is not releasing. If you see it on one side only, suspect a stuck caliper before you blame your driving.
Step 3: Measure Rotor Thickness and Runout
A rotor can look fine and still be too thin, so measuring is what separates a quick check from a real inspection. This is also how to tell if rotors are warped: by measuring, not guessing.
Find the Minimum Thickness
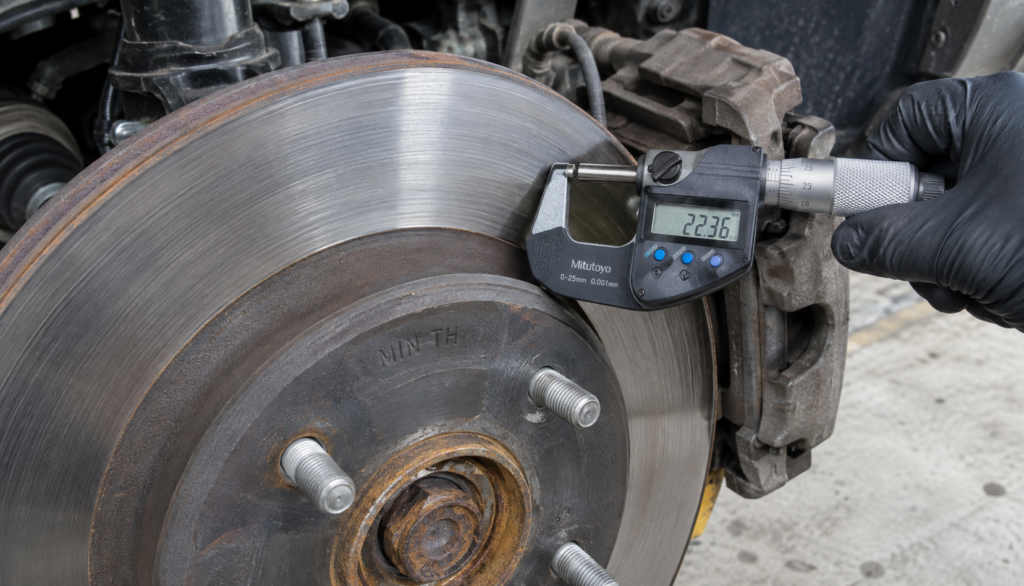
Look on the rotor hat or edge for the letters MIN TH followed by a number in millimeters. If you are wondering what MIN TH means, it simply stands for minimum thickness, also called the discard thickness, and it is the thinnest the rotor is allowed to be. If you cannot find the stamp, check your service manual.
Measure Thickness at Several Points
To measure rotor thickness accurately, first clean the rotor surface with brake cleaner and use a wire brush on any rust at the edge. Then close a micrometer across the friction surface and read the number. Measure at six to eight evenly spaced points around the rotor, and take readings near the inside, middle, and outside of the pad track. Use the lowest reading when you compare to the stamped minimum thickness.
Next, subtract the smallest reading from the largest. That is the thickness variation. Even if every reading is above the minimum, too much variation can cause pulsation you feel through the brake pedal and steering wheel.
Measure Lateral Runout
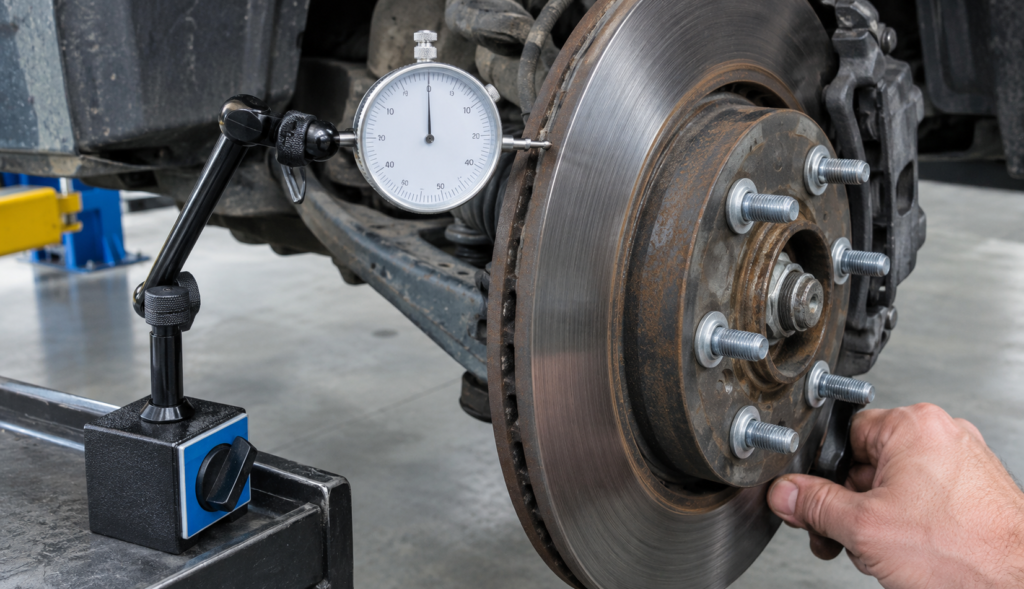
Lateral runout is the side-to-side wobble of the rotor as it spins. Mount a dial indicator on a magnetic base, set the indicator button on the friction surface about 10 mm from the outer edge, and zero it. Rotate the rotor one full turn and read the total swing. Specifications are tiny, usually a few thousandths of an inch or the metric equivalent, so check the service manual for your vehicle. If the rotor is held on loosely, run the lug nuts down with washers so it sits flat against the hub while you measure.
What the Warning Light Doesn’t Tell You
The brake warning light and the ABS light are not rotor monitors. On most cars, no dashboard light tells you a rotor is worn out or below minimum thickness. Some vehicles have pad wear sensors, but those only watch the pads. That is why a rotor can be worn past its limit with a perfectly clean dashboard.
Here are the things a quick check and a dashboard will not reveal:
- “Warped” is usually something else. Pulsation is often blamed on warped rotors, but the real cause is frequently thickness variation, pad material deposits, or runout. Rust or debris on the hub flange can push a brand-new rotor out of true and bring the pulsation back within a few thousand miles.
- The rotor may be the symptom, not the cause. A sticking caliper or seized caliper slide pins can overheat one rotor, wear the inboard and outboard pad unevenly, and ruin a fresh set of rotors fast. Replacing the rotor without fixing the caliper just repeats the problem.
- Above minimum does not mean safe. A rotor with cracks or heat damage should be replaced even if it measures within spec.
- Surface rust is not the same as pitting. The first is cosmetic; the second reduces the contact area of the pads.
- Resurfacing removes metal. A rotor close to minimum may not survive being cut, so measure before you pay for it.
Resurface, Replace, or Keep Driving?
Once you have your findings, the decision is usually straightforward.
Keep driving and keep monitoring if the surface only has light rust or fine lines, the thickness is comfortably above the minimum, and variation and runout are within spec.
Whether to resurface or replace comes down to how much metal is left. If you find shallow grooves, glazing, or measurable thickness variation but the rotor still has enough material above the minimum machine thickness, resurfacing is an option. Many shops will simply replace the rotors because the cost difference is small and a fresh rotor starts at full thickness.
Replace the rotors if they are below the stamped minimum, have cracks, show blue heat damage, have deep grooves that cannot be cut out, or still cause vibration after you have ruled out the hub and the caliper. Replace rotors in pairs on the same axle so the brakes work evenly. As a general rule, many rotors last somewhere around 50,000 to 70,000 miles, and some are replaced every second pad change, but your measurements matter more than any mileage guess.
See a mechanic if you find cracks, if the brake pedal sinks or feels soft, if you hear constant grinding, if the car pulls hard to one side, or if you cannot take accurate measurements yourself. Brakes are a safety system, so when in doubt, have a professional check the brake fluid level, calipers, and lines at the same time.
Frequently Asked Questions
Q. How often should you inspect brake rotors?
A. Look through the wheels at each tire rotation, and do a full inspection with the wheel off at every brake pad replacement and at least once a year. Inspect sooner if you hear grinding or feel pulsation in the brake pedal.
Q. Can you inspect brake rotors without removing the wheel?
A. Partly. With open-spoke wheels and a flashlight you can spot deep grooves, blue heat marks, and a wear indicator touching the rotor. You cannot measure thickness or see the inner face well, so it works as a screening check only.
Q. What does MIN TH mean on a brake rotor?
A. MIN TH is the minimum thickness stamped on the rotor in millimeters. If any measurement falls at or below that number, the rotor must be replaced.
Q. Can you drive with grooved rotors?
A. Light scoring is normal and safe. If your fingernail catches in the grooves, the rotor is worn, braking performance drops, and the rotor should be resurfaced or replaced soon. Grinding with deep grooves means stop driving and get the brakes checked.
Q. Should you replace rotors every time you replace the pads?
A. Not always. Measure first. If the rotors are within spec, smooth, and free of cracks, they can often stay, though many technicians replace them with every second pad change.