
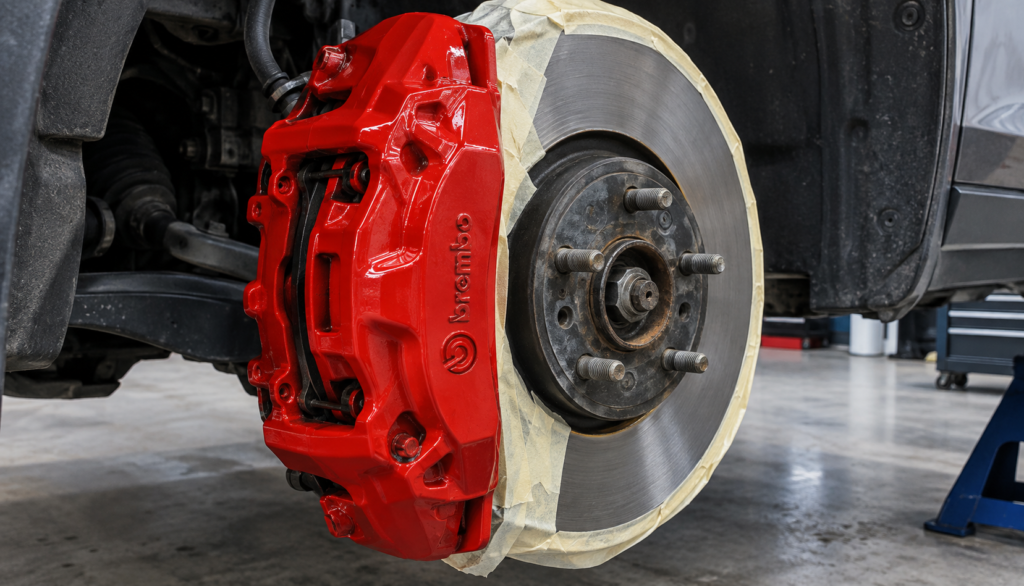
Brake calipers take a beating. They sit exposed behind the wheel, get coated in brake dust, soak up road salt and grime, and run hot every time you touch the brake pedal. Over time, factory paint fades, chips, or turns a chalky gray — and a lot of car owners want to know how to paint brake calipers without ruining performance or wasting a weekend on a job that peels off in six months.
Painting your calipers is one of the more affordable ways to refresh how your wheels look, but it only works if you use the right paint, prep the surface properly, and understand what the process can and can’t fix. This guide walks through paint types, step-by-step application, drying and curing times, and the mistakes that cause caliper paint to fail early.
What Kind of Paint Do You Need for Brake Calipers?
Regular spray paint will not survive on a brake caliper. Calipers routinely reach 300–400°F under normal driving and can spike much higher under hard or repeated braking, so you need a coating rated specifically for that environment. There are four main categories of caliper paint, and each has real tradeoffs.
- High-temp acrylic: Water-based, easiest to apply, and the most affordable option. Heat resistance is decent for daily driving but lower than enamel or ceramic, and it’s more prone to fading over time.
- High-temp enamel: Oil-based with strong adhesion and a smooth glossy finish. This is the most common choice for a DIY caliper paint job because it balances cost, durability, and heat resistance well.
- Epoxy caliper paint: A two-part system that chemically cures into a hard shell once mixed. It’s more labor-intensive to apply but holds up better against chipping, brake fluid, and road chemicals than single-part paints.
- Ceramic caliper paint: The most heat-resistant option, with some formulas rated up to 1,200°F. It’s the choice most track-day and performance drivers reach for, but it also demands the most careful surface prep to bond correctly.
If you’re not sure which to pick, high-temp enamel is the safest starting point for a first-time caliper paint job — it’s forgiving to apply and holds color well under normal street driving.
Do You Need to Remove the Calipers to Paint Them?
You don’t strictly have to remove calipers to paint them, but most people get a cleaner result if they do. Painting with the caliper still mounted means working around the rotor, hub, and brake lines, which makes even coverage harder and increases the risk of overspray landing somewhere it shouldn’t — including the rotor’s braking surface.
Removing the caliper isn’t the same as disconnecting the brake line. You can typically unbolt the caliper from its mounting bracket, support it with a bungee cord or wire so it isn’t hanging on the hose, and paint it in place or on a workbench without opening the hydraulic system. This gives you 360-degree access and a much better finish, especially on the backside of the caliper that’s normally hidden behind the wheel.
How to Paint Brake Calipers: Step-by-Step
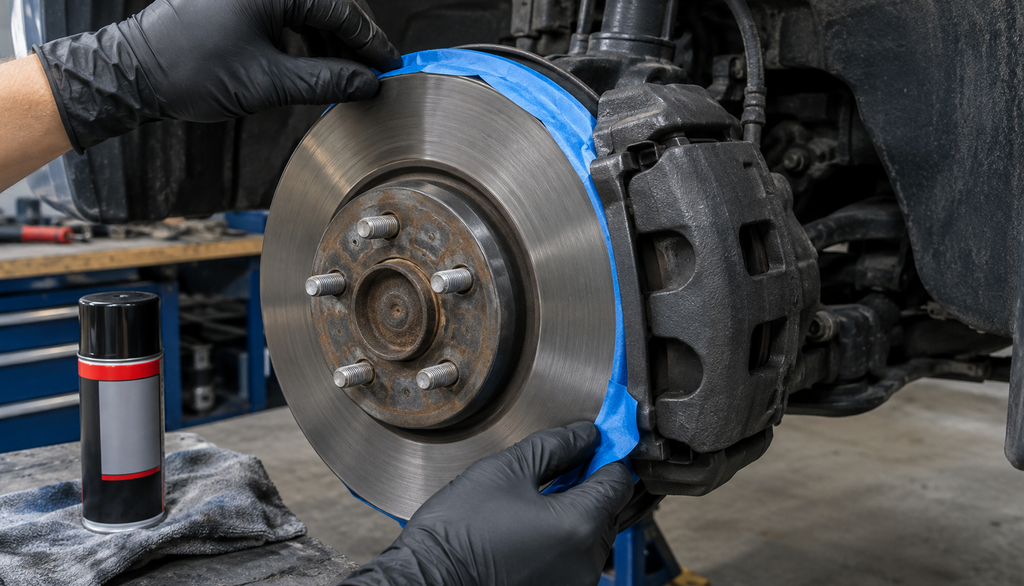
Here’s the general process most caliper paint kits and manufacturers recommend, whether you’re using a spray-on high-temp enamel or a brush-on epoxy system.
- Jack up the car and remove the wheel. Use a jack and jack stands rated for your vehicle’s weight — never work under a car supported only by a jack.
- Clean the caliper thoroughly. Use a dedicated brake cleaner spray or degreaser to strip brake dust, grease, and road grime. Skipping this step is the single biggest reason caliper paint fails early.
- Rough up the surface. Light sanding with fine-grit sandpaper or a wire wheel helps the new paint mechanically bond to the caliper, especially over old, glossy factory paint.
- Mask everything you don’t want painted. Use painter’s tape and masking paper to protect the rotor, brake pads, wheel studs, and rubber brake line. Overspray on the rotor’s friction surface can cause noise or reduced braking performance until it wears off.
- Apply primer if the paint system calls for it. Some high-temp paints are self-priming; others need a dedicated primer coat first. Check your specific product’s instructions.
- Apply thin, even coats. Two to three light coats produce a better finish than one heavy coat, which is more likely to run, sag, or trap air bubbles.
- Apply a clear coat if desired. A clear coat adds gloss and an extra layer of chemical resistance, though many high-temp paints look finished without one.
- Let it cure fully before driving. This is the step most people rush — see below for why it matters.
Drying Time vs. Curing Time — Why the Difference Matters
Most caliper paints are dry to the touch within 30–60 minutes, but “dry” and “cured” are not the same thing. Curing is the chemical hardening process that gives the paint its full heat resistance, and it takes much longer — often overnight, and sometimes up to 24–48 hours depending on the product.
If you drive on the paint before it’s fully cured, the heat from normal braking can soften the finish before it’s had a chance to harden completely. That’s one of the most common reasons DIY caliper paint jobs end up looking scorched, bubbled, or discolored within the first few weeks — not because the paint was defective, but because the car went back on the road too soon.
What the Warning Light Doesn’t Tell You
Painting your calipers is a cosmetic project, not a repair — and it’s worth being clear-eyed about what it does and doesn’t do. A fresh coat of paint can make tired, dusty calipers look brand new, but it has no effect on brake performance, pad wear, or rotor condition. If your calipers look rough because of years of neglect, that’s often a sign it’s a good time to also inspect the pads, rotors, and caliper slide pins while everything is apart — not just repaint over the problem.
It’s also worth knowing that painting over a sticking caliper piston or seized slide pin doesn’t fix either issue — it just hides it under new color until the underlying problem causes a noise, pull, or uneven pad wear down the road. If a caliper feels stiff to move, seized, or unusually hot to the touch after driving, that’s a mechanical issue that paint won’t resolve, and it’s worth having inspected separately from any cosmetic work.
One more thing that catches people off guard: caliper color has no effect on brake performance or heat dissipation. It’s purely aesthetic. Don’t let a listing or forum post convince you a certain color “runs cooler” — the paint’s heat rating matters, not its shade.
How Long Does Caliper Paint Last?
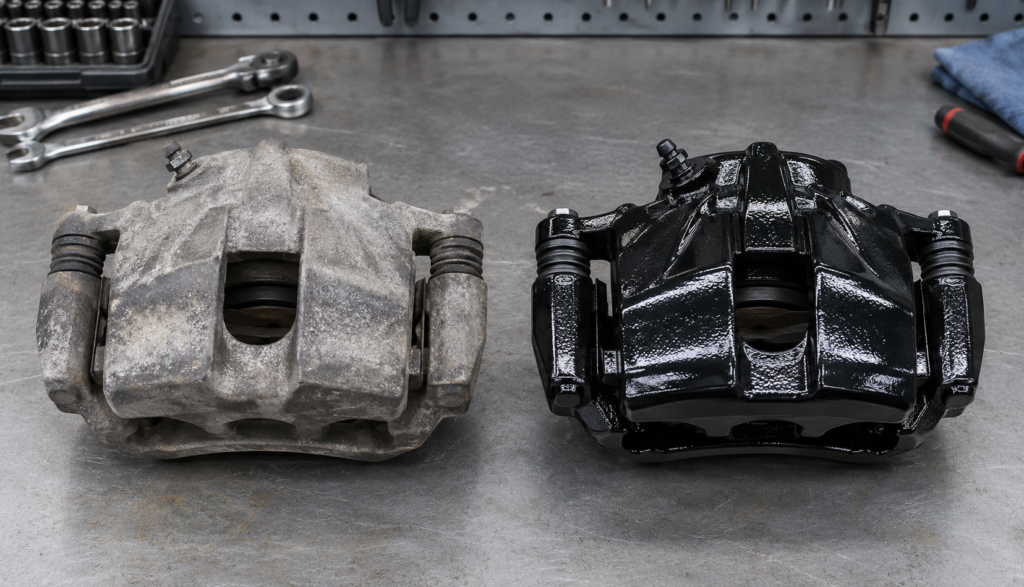
With proper prep and a quality high-temp product, caliper paint typically lasts 2–5 years under normal street driving before it starts to fade or show wear. Ceramic and epoxy systems tend to hold up longer than acrylic. Paint life is shortened by skipped surface prep, exposure to heavy road salt in winter climates, aggressive brake use that runs calipers hotter than the paint’s rating, and rushing the cure time before driving.
If you notice caliper paint peeling in sheets rather than gradually fading, that’s almost always a surface prep issue — grease, rust, or old flaking paint left underneath the new coat — rather than a problem with the paint itself.
DIY vs. Professional Caliper Painting
Most caliper paint kits are designed for home use and don’t require special equipment beyond basic hand tools, sandpaper, and a well-ventilated space. A DIY job typically costs $20–$60 for a full set of four calipers if you already have basic tools on hand.
Professional caliper painting or powder coating services generally run higher, since pricing depends heavily on your specific vehicle, caliper size, and whether the shop removes the calipers entirely for booth-quality coverage. Powder coating in particular is usually a professional-only process, since it requires baking the part in an oven to cure — it’s more durable than spray or brush-on paint but isn’t a realistic DIY project for most home garages.
| Option | Typical Cost | Durability | Best For |
|---|---|---|---|
| DIY spray/brush-on paint | $20–$60 | 2–5 years | Budget-conscious daily drivers |
| Professional caliper painting | Varies by shop and vehicle | Similar to DIY, better finish quality | Those wanting a cleaner result without doing it themselves |
| Powder coating (professional only) | Higher than paint | Longest-lasting, most chip-resistant | Show cars, long-term durability |
Frequently Asked Questions
Q. Can I paint my brake calipers without removing the wheels?
A. No — you need the wheels off to access the calipers properly. You don’t necessarily need to remove the calipers themselves from the vehicle, but the wheel has to come off for safe, even coverage.
Q. Does painting brake calipers affect braking performance?
A. Not if it’s done correctly. Paint applied to the outside housing of the caliper doesn’t touch the internal hydraulic components or the pads and rotors that actually create stopping power. The risk is overspray landing on the rotor’s friction surface, which is why masking matters.
Q. How many coats of caliper paint do I need?
A. Most high-temp paints recommend two to three thin coats rather than one thick coat, which helps avoid drips and gives a more even, durable finish.
Q. Is ceramic or epoxy caliper paint better than regular high-temp paint?
A. Ceramic and epoxy systems generally offer higher heat resistance and better long-term durability, but they also require more careful surface prep and are less forgiving to apply. For everyday street driving, a quality high-temp enamel is often a simpler and perfectly durable choice.
Q. Why is my caliper paint chipping or peeling already?
A. This usually points back to surface prep — leftover grease, rust, or old paint that wasn’t fully removed before the new coat went on — rather than a failure of the paint itself.