
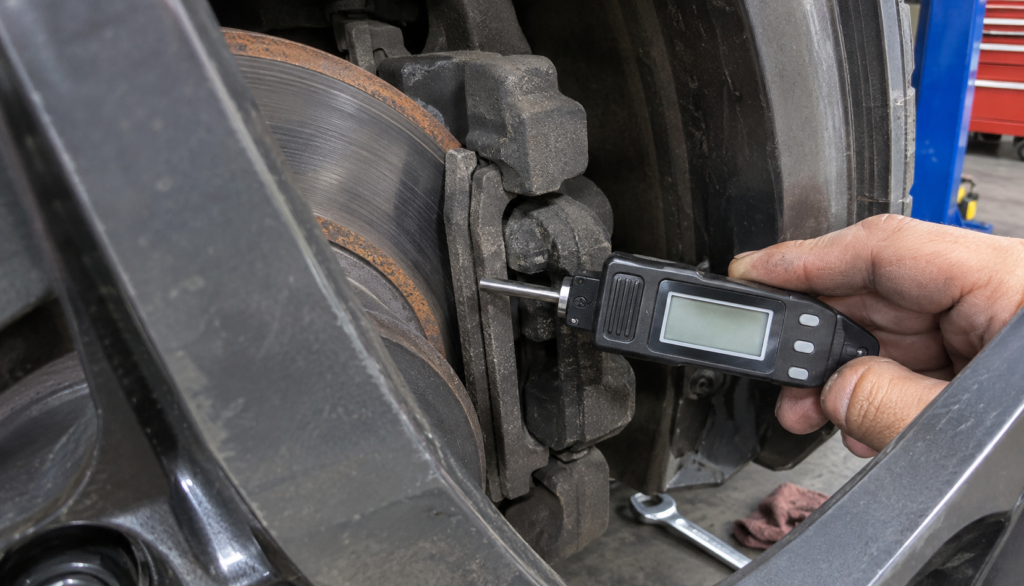
If you’ve ever pulled a wheel to check your brakes or watched a mechanic hold up a small metal tool against your brake pad, you’ve seen a brake pad thickness gauge in action. It’s one of the simplest diagnostic tools in the automotive world, but the numbers it produces can be confusing if you don’t know what you’re looking at. Is 4mm good? Is 2mm an emergency? This guide breaks down exactly what a brake pad thickness gauge measures, what the readings mean, and how to use that information to decide whether your brakes are fine, worth watching, or due for immediate replacement.
What Is a Brake Pad Thickness Gauge?
A brake pad thickness gauge is a small measuring tool — often a simple caliper-style device or a specialized wedge gauge — used to measure how much friction material remains on a brake pad. Some are purely mechanical, similar to a small ruler with a sliding jaw. Others are digital brake pad gauges that display a precise thickness reading in millimeters on a small screen.
The tool is inserted through the wheel spokes or through an inspection hole in the caliper, allowing you to measure brake pad thickness without removing the wheel or pulling the caliper off entirely. Mechanics use this method during routine inspections because it’s fast, and it gives a reliable snapshot of remaining pad life without a full brake teardown.
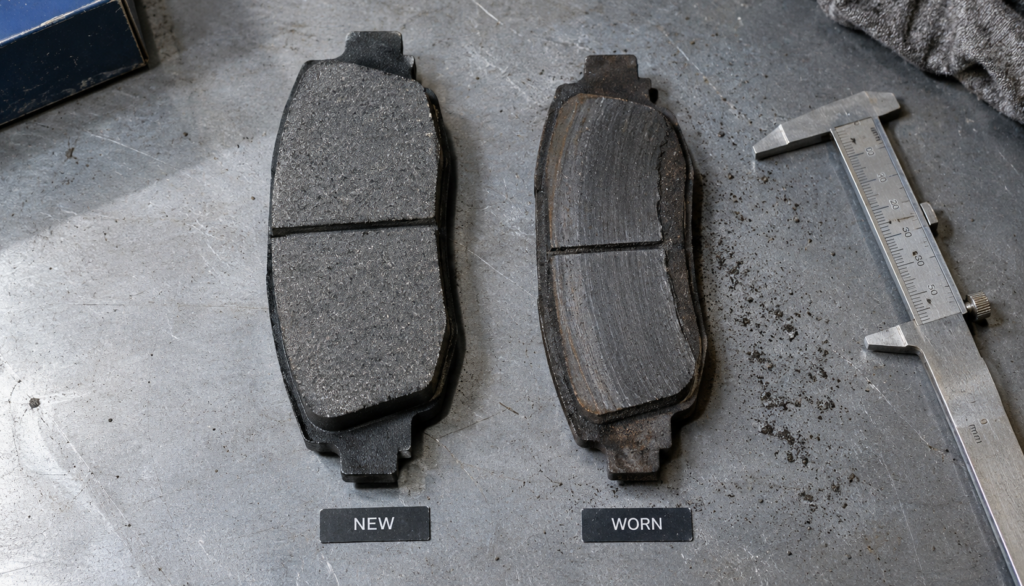
A more thorough measurement — the kind done during a full brake service — involves removing the wheel and taking the pad out to measure it directly with a brake pad micrometer or digital caliper. This gives a more accurate reading than eyeballing through a gap, especially for pads that wear unevenly.
How to Measure Brake Pad Thickness
There are two common approaches, depending on the tools and access available.
Method 1: Visual/Gauge Check Through the Wheel
- Locate the caliper and identify the brake pad pressed against the rotor.
- Insert the tip of the gauge between the pad’s edge and the rotor surface.
- Read the measurement where the gauge contacts the remaining friction material — not the metal backing plate.
- Check both the inner and outer pad, since wear is often uneven side to side.
Method 2: Direct Measurement (Wheel and Caliper Removed)
- Remove the wheel and unbolt the caliper from its bracket.
- Slide the pads out and measure the friction material thickness with a digital caliper or micrometer.
- Measure at multiple points across the pad face to catch tapered or angled wear.
If you don’t have a dedicated gauge, checking brake pads without a gauge is still possible using a flashlight and a ruler through the wheel spokes, though this method is less precise and mainly useful for a rough “does this need attention soon” read rather than an exact number.
Brake Pad Thickness Chart: What’s Normal, What’s Low, What’s Critical
| Thickness | Condition | Action Needed |
|---|---|---|
| 10–12mm | New brake pad thickness (varies by brand/vehicle) | None — pad is new or near-new |
| 6–10mm | Healthy, normal wear | None — recheck at next service interval |
| 4–6mm | Moderate wear | Monitor; plan for replacement in coming months |
| 3mm | Low brake pad thickness | Schedule replacement soon |
| 2mm or less | Minimum brake pad thickness — near or at wear limit | Replace immediately |
These numbers are general guidelines. OEM brake pad thickness specs vary by manufacturer, and some vehicles list a specific minimum thickness in the owner’s manual or service documentation. Aftermarket brake pad thickness can also differ slightly from OEM specs depending on the friction compound and backing plate design, so when in doubt, check the pad packaging or manufacturer spec sheet for your exact vehicle.
Front vs. Rear Brake Pad Thickness — Why They Wear Differently
Front brake pad thickness typically decreases faster than rear pad thickness. Front brakes handle the majority of stopping force during normal braking — often 60–70% of total braking load — because weight transfers forward under deceleration. This means front pads are usually replaced more often, sometimes twice as often as rear pads depending on driving style and vehicle weight distribution.
Rear brake pad thickness matters just as much for safety, but a slower wear rate means rear pads often get overlooked during casual inspections. If you’re only checking the front axle, you’re getting an incomplete picture of your overall brake pad life expectancy.
Signs Your Brake Pad Thickness Is Getting Low
Thickness measurement is the most accurate way to know where your pads stand, but several signs of worn brake pads often show up before you ever put a gauge on them:
- A high-pitched squeal when braking — this is often the built-in brake pad wear indicator, a small metal tab designed to contact the rotor and make noise once the pad nears its wear limit.
- A grinding or metal-on-metal sound, which usually means the pad has worn past the friction material entirely.
- Longer stopping distances or a spongy brake pedal feel.
- Visible thin pad material when looking through the wheel spokes.
- A dashboard brake pad wear indicator light, present on many newer vehicles with electronic sensors built into the pad.
Squealing brakes from low pad thickness is one of the most common reasons drivers first check their brake pad thickness reading, and it’s a reliable early warning if your vehicle has a wear indicator tab.
Brake Pad Thickness vs. Mileage: Why There’s No Fixed Number
There’s no universal mileage figure for how long a brake pad lasts, because brake pad wear rate depends heavily on driving conditions. City driving with frequent stops wears pads faster than highway driving. Aggressive braking, heavy vehicle loads, towing, and mountainous terrain all accelerate wear. As a rough range, many pads last somewhere between 25,000 and 65,000 miles, but this varies enough that thickness measurement — not odometer mileage — is the more reliable way to judge remaining brake pad life expectancy.
This is also why a fixed “check every X miles” rule is less useful than a physical brake inspection interval tied to your actual driving habits. Someone doing mostly highway commuting might go much longer between checks than someone driving stop-and-go city traffic daily.
What the Warning Light Doesn’t Tell You
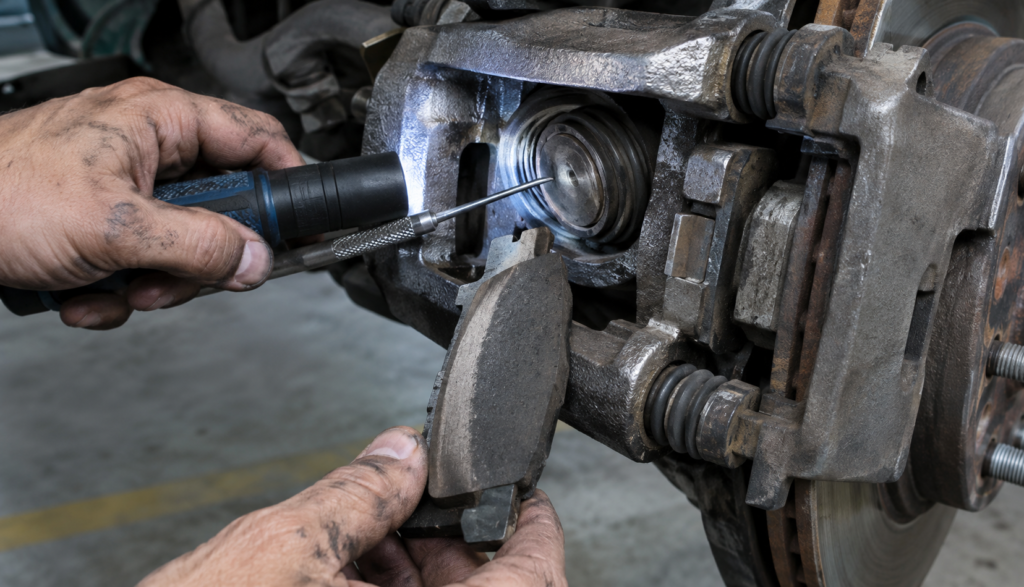
A brake pad wear indicator light on the dashboard tells you a sensor has been triggered — it does not tell you exactly how much material is left, how evenly the pad has worn, or whether the rotor underneath has also been damaged. Relying on the light alone as your only check can be misleading for a few reasons.
First, not every vehicle has electronic pad wear sensors on all four wheels — some only monitor the front axle, meaning a worn rear pad could go undetected by the dashboard entirely. Second, the audible squeal from a mechanical wear indicator tab is designed to go off before the pad is dangerously thin, but if road noise or a loud cabin masks the sound, that early warning can be missed. Third, uneven brake pad wear — often caused by a sticking caliper piston or an ABS sensor issue — means one section of the pad can be dangerously thin while another section still measures adequate thickness. A single-point check without moving the gauge across the pad face can miss this.
This is also where a cheap fix can mask something bigger: pads wearing unevenly or unusually fast are sometimes a symptom of a sticking caliper piston, worn caliper slides, or a brake hose restricting fluid return — not just normal wear. Replacing the pads without diagnosing why they wore unevenly often means repeating the same problem within a few months. If your brake pad thickness reading shows a lopsided pattern from one side of the pad to the other, that’s worth a caliper inspection, not just a pad swap.
Brake Pad Thickness and Rotor Health
Brake rotor thickness minimum specs matter alongside pad thickness because a worn rotor changes how a pad wears and how it performs. Rotors have their own minimum thickness spec, usually stamped on the rotor hub or listed in service manuals, and a rotor machined too thin (or worn past spec through use) can cause vibration, uneven pad contact, and faster pad wear on one side. When checking brake rotor and pad thickness together, a mechanic can tell you whether a pad-only replacement is sufficient or whether the rotors need resurfacing or replacement as well.
Pad Material and Thickness: Does Compound Matter?
Ceramic vs. semi-metallic pad thickness specs are generally similar in terms of new-pad dimensions, but wear rate and how each material approaches its minimum thickness can differ. Ceramic pads tend to wear more slowly and more evenly, producing less brake dust, while semi-metallic pads often provide stronger stopping power under heavy use but can wear down faster and generate more noise as they approach the wear limit. Neither compound changes the safety threshold — the same brake pad wear limit applies regardless of material — but it does affect how often you’ll want to schedule a brake pad thickness check.
Cost of Checking and Replacing Based on Thickness
A basic thickness check performed as part of a routine service or tire rotation is often free or bundled into standard shop inspection fees, since it takes just a few minutes with a gauge inserted through the wheel. A standalone brake pad thickness gauge tool for home use is inexpensive — mechanical versions cost very little, while a digital brake pad gauge with a screen display runs a bit more but still stays affordable for a DIY toolbox.
If your thickness reading shows pads at or near the wear limit, brake pad replacement cost typically depends on the vehicle, pad material, and whether rotors need to be resurfaced or replaced alongside the pads. A professional brake inspection that includes a thickness check is a low-cost way to catch this before it becomes a more expensive rotor or caliper repair.
When to See a Mechanic
Get a professional inspection if any of the following apply:
- Your brake pad thickness reading is at or below 3mm on any pad.
- You hear grinding, not just squealing, when braking.
- The brake pad wear indicator light is on and you haven’t had a thickness check in the last several months.
- You notice uneven brake pad wear between the inner and outer pad, or between the left and right side of the same axle.
- You’re unsure how to safely remove a wheel or use a gauge and want a confirmed reading before deciding on next steps.
A DIY brake pad thickness check is a great way to stay ahead of routine wear, but a professional inspection is worth it whenever the reading is borderline, uneven, or paired with any unusual noise or pedal feel.
Frequently Asked Questions
Q: What is the minimum brake pad thickness before replacement?
A: Most manufacturers consider 2–3mm the minimum safe brake pad thickness, though some vehicles specify their own exact minimum. Below this point, pads should be replaced immediately to avoid metal-on-metal contact with the rotor.
Q: Can I measure brake pad thickness without removing the wheel?
A: Yes. A gauge or flashlight-and-ruler method inserted through the wheel spokes lets you measure brake pad thickness without removing the wheel, though a direct measurement with the wheel off is more accurate, especially for uneven wear.
Q: How often should I check my brake pad thickness?
A: A reasonable brake inspection interval is every 6 months or with each tire rotation, though drivers who do a lot of city or stop-and-go driving may want to check more frequently since brake pad wear rate increases under those conditions.
Q: Do front or rear brake pads wear out faster?
A: Front brake pad thickness usually decreases faster than rear pad thickness, since front brakes handle a larger share of stopping force. This doesn’t mean rear pads should be ignored — just that fronts typically need attention sooner.
Q: Is a digital brake pad gauge more accurate than a manual one?
A: A digital brake pad gauge generally provides a more precise numeric reading than a manual wedge-style gauge, which is useful for tracking small changes over time, though both types are accurate enough for routine wear checks when used correctly.